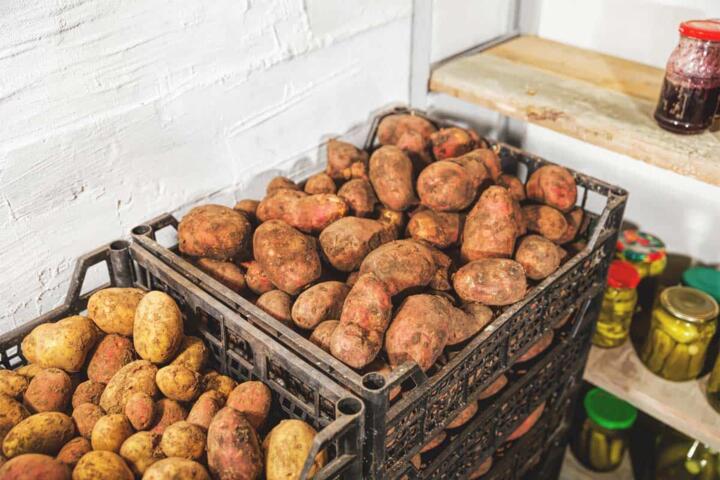
Root Cellars And Natural Cooling
A root cellar is a storage space designed to keep food cool and, for many crops, humid enough to slow dehydration. The cooling comes mainly from the ground’s thermal stability rather than from mechanical refrigeration. In many climates, soil temperatures several feet below grade stay within a narrow band through winter and summer, which helps slow microbial growth and reduce ripening. A practical example: apples stored in a cool, humid cellar often last far longer than apples stored on a kitchen counter, where warmth and dry air accelerate softening and shrinkage.
Design choices determine whether the cellar behaves like a steady “cold room” or like an unpredictable box that freezes, sweats, or grows mold. You can build a dedicated structure, convert an existing basement corner, or create a small in-ground pit with a well-planned entrance. The key variables are temperature range, humidity control, and airflow management, because these three factors interact. If you get one wrong, the others usually compensate in the wrong direction, and food quality drops fast.
Common Mistakes And Bottlenecks
People often treat a root cellar as “any cool dark place,” then wonder why potatoes sprout, onions mold, or leafy greens turn slimy. Ground temperature helps, but it does not automatically solve condensation. When warm, moist air meets a colder surface, water condenses; that moisture can feed surface molds and encourage rot in produce with damaged skins.
Another bottleneck is airflow. Too little ventilation traps carbon dioxide and excess moisture, which can raise spoilage risk for some foods. Too much ventilation can dry produce and pull cellar temperatures toward outdoor swings, especially near the entrance. The supporting technologies are simple but specific: insulation or earth cover, a vapor-tolerant wall system, a controlled vent arrangement, and a door or hatch that limits warm air infiltration during frequent access.
Food selection also matters. Some foods tolerate cool, humid storage; others prefer dry, airy conditions. Mixing them without planning creates conflicts. Potatoes and apples can share a cellar, but onions and garlic usually need drier air to reduce mold pressure. If you store everything together in the same bins, you end up optimizing for the most fragile item, not the whole harvest.
Build Choices That Control Temperature
Start with a realistic target temperature range for your climate. Many root-cellar users aim for roughly 32–55°F (0–13°C), with the exact sweet spot depending on the foods. Apples and many root vegetables store well in the cool end of that range, while freezing risk rises as temperatures approach 32°F (0°C). If your site experiences deep winter freezes, you need enough earth cover and insulation at the right places so the cellar floor and walls do not become cold enough to freeze stored items.
Earth contact is the main thermal buffer. A typical approach uses a pit or partially buried structure with thick soil cover and a well-sealed but ventilated interior. Insulation is often placed on the exterior side of the structure or around the entrance zone rather than inside the storage area, because you want the storage surfaces to stay within the stable band. A small aside from planning work: on a project I reviewed in early 2024, the entrance corridor was the coldest zone because the door leaked warm air and the corridor lacked thermal mass, which caused condensation on the inner wall.
Moisture management starts with surfaces. Smooth, non-porous walls can feel “clean,” but they can also encourage condensation to bead and drip onto produce. Porous materials and drainage layers can help move moisture away from food contact points. If you use a basement conversion, check for existing dampness and water intrusion; a cellar that already has seepage needs a water-control plan before you add food storage.
Ventilation And Humidity Setup
Ventilation should be designed to move air without creating constant drafts. A common method uses two vents: an intake near the floor and an exhaust near the ceiling, often with adjustable dampers. In winter, the goal is to prevent warm moist air from entering and condensing; in summer, the goal is to avoid heat buildup while still limiting humidity loss. The exact vent sizes depend on cellar volume and local conditions, so treat vent dimensions as a starting point and verify with measurements.
Use simple instruments to avoid guessing. A digital thermometer with a min/max log helps you see daily swings, and a hygrometer shows whether humidity is drifting too low or too high. Many people buy a cheap hygrometer and then trust it without calibration; that can mislead decisions about mold risk. If you can, calibrate using a known humidity reference or at least compare readings across two devices. I’ve seen a 10–15% relative humidity difference between two inexpensive sensors in the same room, which changes how you interpret condensation.
Humidity targets vary by crop. Root vegetables and many apples tolerate higher humidity, while onions and garlic generally store better with drier air. If you notice persistent condensation on walls or bins, reduce warm-air infiltration at the door and adjust vent timing rather than adding fans that dry everything out.
Layout, Bins, And Food Handling
Layout affects airflow around produce. Use breathable containers such as wooden crates, slatted shelves, or baskets that allow air movement. Avoid airtight plastic bins for items that still have field moisture or damaged skins, because trapped moisture accelerates rot. Keep produce off the floor by using pallets or racks so any condensation does not contact food directly.
Handle harvests with storage in mind. Cure potatoes and many root crops before long storage by drying skins and reducing surface moisture; the curing period depends on crop and temperature, and it typically lasts days to a couple of weeks. For apples, sort by ripeness and remove bruised fruit early, since damaged apples release more ethylene and spoil faster. A practical aside: if you store apples and pears together, the ripening signal spreads; separating by variety and checking weekly reduces losses.
Separate “wet” and “dry” storage zones if your cellar design allows it. Even a simple partition or different shelf levels can create microclimates. If you cannot separate zones, choose a compromise that matches the most perishable crop you plan to store for months.
Safety Limits: Freezing, Mold, And Rot
Freezing is a quality and safety problem for many foods. Frozen produce often becomes mushy after thawing, which invites bacterial growth and increases spoilage. If your cellar floor freezes, move sensitive items to higher shelves or add insulation to the floor zone. Monitor with a probe thermometer placed near the storage level, not just at the door.
Mold is a moisture-management signal, not a “cleaning problem.” Remove spoiled items promptly, because rot spreads through contact and through airborne spores. If you see recurring mold, investigate the cause: high humidity, poor airflow, warm air leaks, or wet harvests. Bleach or fungicide treatments are not a substitute for correcting moisture sources, and they can leave residues that you do not want on food-contact surfaces.
Also consider pests. Rodents and insects can enter through gaps around vents and doors. Screen vents with appropriate mesh and seal penetrations. A mild frustration many builders run into: the vent screens reduce airflow, so you may need to adjust vent openings after installing them and then re-check temperatures and humidity.
Case Examples From Realistic Setups
Small Basement Conversion
A household in a temperate region converted a basement corner into a cellar using a sealed hatch and two vents with adjustable dampers. They placed a slatted shelf system to keep produce off the floor and used a hygrometer to track humidity. During the first month, condensation formed on the inner wall after evening door openings, and leafy greens spoiled within two weeks. They reduced door opening time, added weatherstripping, and adjusted the vent dampers to reduce warm air intake; after that, greens lasted closer to a month, while potatoes remained firm longer.
Partially Buried Shed Cellar
A rural household built a small partially buried structure with thick earth cover and a drainage layer beneath the floor. They stored apples in wooden crates and onions in separate mesh bags on a higher shelf. In late summer, the cellar warmed above their target range because the entrance corridor acted like a heat bridge. They added insulation around the entrance zone and improved the door seal, then used min/max logging to confirm the temperature band stabilized. After the change, apples stored through winter with fewer soft spots, and onions showed less surface mold.
Decision Checklist For Food Storage
| Food Group | Typical Cellar Conditions | Storage Risk If Wrong | Practical Handling |
|---|---|---|---|
| Apples | Cool, moderately humid | Softening, faster spoilage from bruises | Sort by ripeness; remove damaged fruit weekly |
| Potatoes | Cool, higher humidity; dark | Sprouting, shriveling | Cure before storage; keep in breathable bins |
| Onions/Garlic | Cool, drier air | Mold on skins | Store separately; use mesh or ventilated baskets |
| Leafy Greens | Cool, high humidity; minimal condensation | Sliminess, rot | Use breathable wrapping; check often |
Use this step-by-step checklist before filling the cellar. Measure temperature and humidity for several days, then adjust vents and door sealing. Start with a small batch of each crop so you can observe spoilage patterns without committing the whole harvest. Keep a simple log with dates and sensor readings; a short note beats memory, especially when you change vent settings. When you see condensation, address air leaks and airflow first, since adding more moisture to a wet problem rarely helps.
Common Mistakes That Undermine Results
One frequent mistake is ignoring the entrance zone. A cellar can hold stable temperatures deeper inside while the door area swings with outdoor weather, and that zone becomes a condensation hotspot. Another mistake is storing un-cured potatoes or freshly washed produce without drying, which adds surface moisture that the cellar cannot “fix.”
People also overpack bins. Dense stacking reduces airflow and traps humidity around produce surfaces, which increases rot risk. A related error is using non-breathable containers for items that still have moisture, since plastic can turn a humidity problem into a wet rot problem.
Finally, many builders chase one metric and ignore the others. Chasing lower temperature by opening vents wider can dry produce and raise sprouting risk, while chasing higher humidity can increase mold. The most reliable approach uses measurements at the storage level and changes one variable at a time, even if that feels slower than guessing.
FAQ
What Temperature Range Works Best?
Many root-cellar setups target roughly 32–55°F (0–13°C). Freezing risk rises near 32°F (0°C), while warmer conditions speed ripening and microbial growth. Use a probe at the shelf level and adjust insulation or vent settings based on your readings.
How Do I Control Humidity Without Drying Everything?
Use ventilation dampers and reduce warm-air infiltration at the door before adding moisture. If humidity stays too high and condensation appears, increase controlled airflow and improve sealing. If humidity drops too low, reduce vent opening time and store moisture-tolerant crops in breathable containers.
Which Foods Should Not Go In A Root Cellar?
Foods that require refrigeration below typical cellar temperatures, or foods that spoil quickly at cool-but-not-cold conditions, often do not store well. Leafy greens and cut produce are especially sensitive to condensation and airflow. When in doubt, follow food-specific storage guidance from reputable food safety references.
How Often Should I Check Stored Food?
Check at least weekly during the first month, then every 1–2 weeks once conditions stabilize. Remove any bruised or moldy items immediately. Weekly checks also help you catch sensor drift or vent changes that you might not notice.
Do I Need A Drainage Layer?
A drainage layer helps manage ground moisture, especially for partially buried structures. If your site has seepage or seasonal water, plan water control before filling the cellar with food. For basement conversions, address existing leaks first so the cellar does not become a damp environment.
Author's Insight
Root-cellar performance depends on physics you can measure: heat flow from the ground, moisture transport with airflow, and condensation on cold surfaces. Evidence-based food safety guidance emphasizes temperature control and preventing spoilage conditions, which aligns with monitoring temperature and humidity rather than relying on “cool and dark.” I do not have personal clinical experience, so I treat food storage as a practical engineering problem with health consequences. If you want reliable results, log readings for a week, adjust one variable at a time, and match crops to the cellar’s microclimates.
Key Takeaways
Plan for a stable temperature band using earth thermal mass and careful entrance sealing. Design ventilation to manage humidity without constant drafts, and measure at shelf level. Match crops to conditions, separate dry-storing items from moisture-sensitive ones, and cure or dry harvests before long storage. Treat condensation and mold as signals to correct airflow and leaks, not as problems solved by cleaning alone.