Starting A Vegetable Garden
A vegetable garden is a system: sunlight hits plants, soil supplies nutrients and water, and your choices control pests and disease pressure. If you start with a clear plan for those inputs, you avoid the most common beginner failures like planting in shade, overwatering, or skipping soil preparation.
Begin by mapping your space. Note the hours of direct sun on a typical day, the direction of prevailing wind, and where water drains after rain. A simple observation helps: if you can’t comfortably stand there for 30 minutes without shade, the plants will also struggle. For many vegetables, you’ll want at least 6 hours of direct sun, and some crops prefer more.
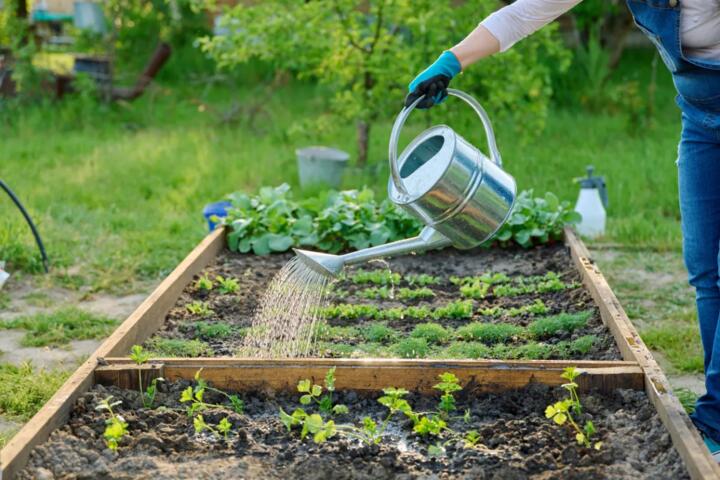
Next, decide whether you’ll grow in-ground beds, raised beds, or containers. In-ground planting works when your soil drains well and you can amend it. Raised beds help with drainage and soil control, and containers are useful for patios with limited space. One practical aside: I’ve seen people buy a “garden kit” and then discover the kit’s soil mix dries out in a week; the container size and local heat matter more than the label.
Main Problems And Pain Points
Most problems start before seeds go into the ground. People often pick crops based on what looks good in a store, then ignore local growing season length, frost dates, and heat tolerance. A tomato variety that thrives in warm weather can stall in cool springs, and a cool-season crop can bolt when temperatures rise.
Soil is another dependency that beginners underestimate. Garden soil is not just “dirt”; it’s a living structure that affects root oxygen, nutrient availability, and water retention. If you skip soil testing and add fertilizer blindly, you can create imbalances like excess nitrogen that produces leafy growth with fewer fruits.
Watering habits also drive outcomes. Overwatering reduces oxygen around roots and encourages fungal issues, while underwatering causes stress that looks like nutrient deficiency. Many beginners water on a schedule instead of based on soil moisture, which is why the same routine can work in spring and fail in summer.
Pest and disease management often becomes reactive. When you plant too densely, skip crop rotation, or keep foliage wet, you raise the risk of problems such as powdery mildew, aphid outbreaks, and soil-borne diseases. Supporting technologies matter here: row covers can reduce insect pressure, drip irrigation can keep leaves drier, and mulch can moderate soil moisture.
Solutions And Advice
Choose Site And Crop Mix
Start with a short crop list that matches your conditions. If your sun is closer to 6 hours, prioritize crops that tolerate partial day light, such as leafy greens, peas, and some root vegetables. If you have 8+ hours, you can expand to fruiting crops like tomatoes, peppers, and cucumbers.
Plan around your calendar. Use your local frost dates to work backward for direct sowing and transplanting. A practical rule: cool-season crops often handle early planting, while warm-season crops need soil temperatures that support germination and steady growth.
For a first garden, aim for 3–5 crop types rather than 10. That reduces spacing mistakes and makes watering and pest checks more manageable. If you’re using a seed-starting setup, a small heat mat can help germination consistency; I’ve seen people set a tray on a cold windowsill and then blame the seeds, when the temperature was the limiting factor.
Build Soil With Testing
Soil testing is the fastest way to stop guessing. Many extension services in the United States offer soil testing through local programs, and the results typically include pH and nutrient levels. Follow the lab’s instructions for sample depth and mixing; inconsistent sampling can skew results.
Once you know pH, you can amend with targeted materials. For example, if pH is low, amendments like lime can raise it over time. If organic matter is low, adding compost improves structure and water-holding capacity, which helps plants during dry spells.
Use compost as a soil conditioner rather than a fertilizer substitute. A typical beginner approach is to mix compost into the top few inches of bed soil, then re-check after a season if the lab suggests it. One mild frustration: many “garden soils” sold in bags are mostly peat or coir with limited nutrients, so they can feed plants briefly and then stall growth unless you add compost or balanced fertilizer.
Start Seeds Or Buy Starts
Decide based on crop biology and your time. Some vegetables transplant well, such as tomatoes and peppers, while others resent root disturbance, such as carrots and many beans. Direct sowing works for crops that germinate reliably in your soil temperature range.
If you start seeds indoors, use containers with drainage and a light source that stays close to seedlings. Seedlings stretch when light is weak, and stretched stems often fail to support later growth. A practical aside: a grow light set to about 2–4 inches above the canopy during early growth can reduce leggy growth, though exact height depends on the bulb and intensity.
Harden off transplants before planting outdoors. Gradually expose them to outdoor conditions over several days so leaves adjust to wind and sun. Skipping hardening off can cause transplant shock that looks like wilting and slow recovery.
Water, Mulch, And Check Weekly
Use a moisture-based watering approach. Check soil 1–2 inches down with a finger or a simple moisture meter, then water deeply when the top layer begins to dry. Deep watering encourages roots to grow downward, which improves drought tolerance.
Mulch helps stabilize moisture and reduces weed competition. Straw, shredded leaves, or wood-chip mulch can work depending on crop type and bed setup. Keep mulch away from direct contact with plant stems to reduce rot risk.
Inspect plants at least once per week. Look under leaves for aphids, check for chewed edges, and monitor for early fungal signs like powdery patches. If you use drip irrigation, you can reduce leaf wetness and lower disease pressure compared with overhead watering.
For a realistic outcome, a well-managed beginner bed often shows visible growth within 2–3 weeks after transplanting, with harvest timing depending on crop. Leafy greens may be ready sooner, while fruiting crops take longer because they must flower and set fruit.
Case Examples For Beginners
Small Yard With Partial Sun
An anonymized scenario: a renter has a 6-hour sun patch near a fence and wants a low-maintenance garden. They choose raised beds with compost-amended soil and plant lettuce, spinach, peas, and radishes in early spring. They direct sow peas and radishes, transplant lettuce starts, and use a light row cover during cool nights.
After two weeks, the radishes germinate unevenly because the soil surface dried between waterings. The fix is a deeper watering once the top inch dries, plus a thin mulch layer to reduce surface evaporation. By week four, the greens grow steadily, and harvest begins in small batches rather than all at once.
Family Garden With Warm Season Focus
An anonymized scenario: a family has a sunny backyard and plants tomatoes, peppers, and cucumbers. They start tomato and pepper transplants indoors, harden them off over a week, and set them into beds amended with compost based on a soil test. They install drip irrigation and mulch after plants establish.
Mid-season, they notice leaf yellowing and assume they need more fertilizer. A closer check shows the soil stays wet after irrigation cycles, and roots appear stressed. They adjust the drip schedule to water less frequently but more deeply, and the plants recover with improved flowering. The lesson is that nutrient symptoms often overlap with watering problems, so you diagnose moisture and drainage before adding more fertilizer.
Checklist And Comparison
| Choice | Best For | Main Tradeoff | What To Watch |
|---|---|---|---|
| In-Ground Bed | Large areas with workable native soil | Drainage and soil chemistry vary | Water pooling after rain; soil test results |
| Raised Bed | Controlled soil and easier weeding | Soil can dry faster | Mulch thickness; irrigation frequency |
| Containers | Patios, balconies, small spaces | Limited root volume | Pot size; consistent moisture |
Step-by-step checklist for a first season:
- Measure sun exposure for 3–5 days and note the longest direct-sun window.
- Pick 3–5 crops that match your season length and heat tolerance.
- Test soil or use a lab-recommended amendment plan for pH and nutrients.
- Choose bed type and set spacing based on seed packet or transplant label guidance.
- Start seeds only for crops that benefit from indoor timing; direct sow the rest.
- Water based on soil moisture at 1–2 inches depth, not on a calendar.
- Add mulch after plants establish to reduce evaporation and weeds.
- Inspect weekly for pests and early disease signs, then respond early.
Common Mistakes To Avoid
Overcrowding is a frequent error. When plants are too close, airflow drops and leaves stay damp longer, which raises disease risk. Spacing guidance on seed packets exists for a reason, and it also affects how easily you can reach plants for inspection.
Another mistake is treating fertilizer as a fix for every symptom. Yellowing can come from nitrogen deficiency, but it can also come from poor drainage, compacted soil, or transplant shock. Diagnose moisture and root stress before adding more nutrients.
Beginners also ignore soil temperature. Warm-season crops planted too early can germinate slowly or fail to establish, while cool-season crops can bolt when temperatures rise. Timing matters more than seed variety names.
Some people skip crop rotation because the garden is small. Even in small spaces, you can rotate plant families across beds or containers each season. If rotation is limited, you can reduce risk by removing plant debris, avoiding repeated planting of the same family in the same spot, and keeping beds weed-free.
Finally, people often rely on overhead watering late in the day. Wet foliage overnight increases fungal pressure. Watering earlier in the day and using drip irrigation when possible reduces leaf wetness, and it rarely causes the “dry leaf” look that overhead watering can create.
FAQ
How much sun do vegetables need?
Many common vegetables perform best with at least 6 hours of direct sun. Leafy greens and some roots can tolerate less, while fruiting crops like tomatoes and peppers typically need more light to flower and set fruit.
Should I start seeds indoors or direct sow?
Transplanting works well for tomatoes and peppers, while carrots and many beans usually do better with direct sowing because root disturbance can reduce yields. Choose based on crop type and your local timing.
What soil test should I request?
Request a soil test that includes pH and basic nutrient levels. Follow the lab’s sampling depth and mixing instructions so the results reflect your bed rather than a single pocket of soil.
How often should I water a new garden?
Water based on soil moisture at 1–2 inches depth. New transplants often need more frequent watering during establishment, while established plants need less frequent but deeper watering.
How do I prevent pests without heavy chemicals?
Use spacing for airflow, remove infested leaves early, and consider physical barriers like row covers for insects. Drip irrigation and mulch reduce stress and leaf wetness, which lowers disease pressure.
Author's Insight
Good vegetable gardening starts with measurable inputs: sun hours, soil pH, drainage, and watering depth. Soil testing and moisture-based watering prevent many “mystery problems” that beginners attribute to bad seeds. Crop timing matters because temperature controls germination and growth rates, not just calendar dates.
When troubleshooting, separate plant stress causes by checking moisture first, then spacing and light, then nutrient levels from a soil test. A small tool detail helps: a basic soil moisture meter version 2.0 can be useful for trends, but it still needs calibration against your own soil by comparing readings to finger checks.
If you want a starting plan that fits your region, use local extension guidance for frost dates and crop calendars, then adjust based on what your plants show after 2–3 weeks. That feedback loop beats guessing, even when the first attempt feels messy.
Key Takeaways
- Match crops to sun and season length before buying seeds.
- Use soil testing to guide amendments instead of guessing with fertilizer.
- Water by soil moisture at 1–2 inches depth, then mulch to stabilize moisture.
- Inspect weekly and fix problems early, especially spacing and leaf wetness issues.
- Start small with 3–5 crops so you can learn your garden’s patterns.