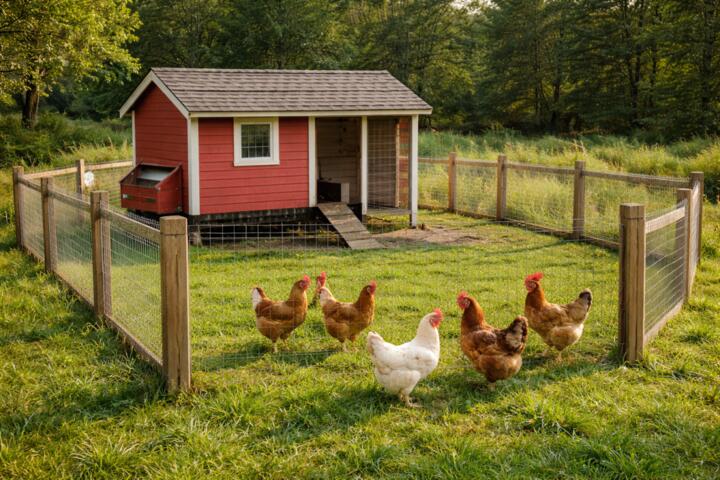
Automated Coop Basics
Automated coop doors control when hens can access the run and when the coop stays closed at night. A typical system uses a motorized latch, a limit switch or position sensor, and a controller that triggers opening and closing based on time, sunrise/sunset estimates, or both. Many doors also include a manual override so you can open the coop during a power outage or if the motor stalls.
Lighting systems usually aim to manage day length for egg production and to reduce stress from abrupt darkness. Common approaches include LED fixtures on a timer, dimmable controllers, or smart plugs that follow a schedule. Security features range from motion-activated cameras and door sensors to alarms that notify you when the coop is opened unexpectedly.
In practice, these systems interact. If the door closes late because of a cloudy-sky sunrise estimate, lighting that stays on too long can confuse birds and shift their routine. If the camera uses Wi‑Fi that drops during storms, you may lose visibility right when predators are most active. The goal is to design for reliability under real weather, power, and connectivity conditions.
Main Problems And Pain Points
People often assume automation removes risk, then discover that the weak link is usually not the motor. It is the environment: humidity, dust, temperature swings, and misalignment between the door and the frame. A door that moves smoothly in a dry garage can bind after months outdoors, especially if the track collects feed dust or if the latch face corrodes.
Another common mistake is treating schedules as “set and forget.” Time-based control can drift if the controller lacks a stable clock or if daylight saving time changes are handled poorly. Sunrise/sunset modes depend on location settings and sometimes on internet access; when the service fails, some controllers fall back to a default schedule that may not match your actual coop timing.
Security pain points often come from false confidence. Motion cameras can miss a predator that stays low to the ground or moves slowly behind shrubs. Door sensors can report “open” when the latch is partially engaged, which creates alert fatigue and leads to ignoring notifications. If you use smart home integrations, you also inherit their failure modes, including router outages and app permission changes.
Supporting technologies matter. A motorized door needs a power source that can handle peak current at startup, plus a way to detect end-of-travel. Lighting needs correct fixture placement to avoid glare and hot spots, plus a schedule that matches your flock’s needs. Security needs power, storage, and a plan for what you do when you receive an alert.
One small aside: I have seen controllers label firmware versions like “v1.8” on the settings page, and the behavior around sunrise offsets changed after an update. If you update firmware, test the door cycle manually the next morning rather than trusting the new logic immediately.
Solutions And Advice
Choose A Door With Feedback
Look for a door that uses limit switches or a position sensor rather than relying only on motor run time. Feedback reduces the chance of “door thinks it closed” when the latch actually missed. During setup, run at least 5 manual open-close cycles in the same conditions you expect at night, including after the coop has cooled down. If the manufacturer provides a calibration routine, complete it and record the final settings.
Plan for power loss. A simple battery backup or a dedicated UPS can keep the controller alive long enough to complete a cycle. If the door system supports it, test how it behaves when power returns mid-cycle; some systems resume from the last known position, while others require a manual reset, which can be annoying when you are away.
For noise and alignment, check the track and latch surfaces monthly. A thin film of corrosion can increase friction, and friction increases motor load, which increases the chance of a stall. If your door uses a rubber seal, inspect it for cracking after cold snaps.
Set Lighting For Routine
Use lighting schedules that avoid sudden transitions. Many keepers start with a timer that turns lights on before sunrise and off after birds have had time to settle, then adjust gradually by 15–30 minutes. If you use dimming, set a low ramp rather than flipping from dark to bright, because abrupt light changes can increase pecking and agitation.
Choose fixtures rated for damp locations if the coop has condensation. LED fixtures reduce heat compared with older bulbs, but they still need ventilation so the driver electronics do not overheat. Keep cords protected from pecking and from water runoff; a drip loop and strain relief reduce failures that happen after storms.
Track outcomes with simple notes: egg counts, bird behavior at dusk, and whether birds roost earlier or later. If egg production changes, adjust lighting in small steps and watch for stress signs like persistent vocalizing or reduced feed intake.
Build Security With Layers
Use at least two layers: detection and response. Detection can be a camera plus a door sensor, or a camera plus an alarm contact on the coop access point. Response can be a siren, a push notification, or an automated light that turns on when motion is detected. Cameras alone often fail silently when the network drops, so plan for offline recording if your system supports it.
For cameras, test night performance at your actual coop distance. Many cameras advertise “color night” but still switch to monochrome at low light, which affects identification. Place cameras to cover the approach path, not just the coop door, because predators often test fences and gaps before reaching the latch.
For alerts, set notification rules that match your routine. If you open the coop daily, configure the system so your own access does not trigger the same alarm every time. This reduces alert fatigue, which is where people start ignoring warnings.
Test Reliability Before Trust
Run a staged test plan before you rely on automation. Week one can use manual override while you observe door travel time, latch engagement, and whether birds enter the coop early enough for the closing schedule. Week two can switch to timed automation while you still stay nearby for at least one full cycle. After that, you can leave automation running while you verify alerts and camera logs.
Keep a small maintenance checklist: clean the track, check fasteners, inspect wiring insulation, and verify sensor alignment. If your controller uses a mobile app, check that the app still has permissions after OS updates; I have watched “location” permissions get reset on iOS after a major update, which broke geofenced sunrise timing.
Document your settings. Write down the open time, close time, sunrise offset (if used), and lighting schedule. When something changes, you can compare the current behavior to the last known good configuration.
Case Examples
Winter Binding And A Fix
A small flock keeper installed an automated door in late fall. The door worked for two weeks, then started closing early by a few minutes and occasionally stopped mid-travel during cold nights. The track had a light dust buildup and the latch face showed early corrosion. The keeper cleaned and dried the track, adjusted the alignment, and replaced the latch hardware with a corrosion-resistant version. After five manual cycles at night temperatures, the door completed full travel consistently.
The lesson was not “automation failed,” but “friction increased under cold conditions.” The motor still ran, yet the system’s end-of-travel detection behaved differently when the latch did not seat fully. A maintenance interval and a better latch surface reduced the problem.
Lighting Schedule Drift
Another keeper used a smart plug for coop lights and a sunrise-based door schedule. After a daylight saving time change, the door closed at the expected time, but the lights stayed on longer than the birds’ routine. The keeper noticed birds roosting later and egg counts shifting over several days. The smart plug had a schedule that followed local time, while the door controller used a location-based sunrise estimate that updated differently. Adjusting the lighting timer to match the door close time and adding a gradual ramp reduced the mismatch.
This scenario shows how two “time” systems can drift relative to each other. Matching schedules to a single reference point, such as door close time, reduces confusion.
Comparison Checklist For Features
| Feature | What It Does | Main Risk If Missing | What To Check |
|---|---|---|---|
| Door End-Stop Feedback | Detects fully open/closed positions | Door may stop short and birds stay exposed | Limit switches or position sensor; test 5 cycles |
| Manual Override | Lets you control the door during faults | You lose access during power or sensor issues | Confirm override steps and where it is mounted |
| Power Backup | Keeps controller running during outages | Door may stop mid-cycle | Test behavior on a short power cut |
| Lighting Timer With Ramp | Controls day length gradually | Abrupt light changes increase stress | Use dimming or step changes; observe roosting |
| Camera Coverage Of Approach | Records the path predators use | You only capture the moment of entry | Check night footage at your distance |
| Door/Access Sensor | Detects unexpected opening | Alerts become noisy or missing | Verify sensor placement and false-open rate |
Step-by-step checklist for a first setup: measure the coop door travel path and confirm clearance, mount the door and verify it closes without birds present, set a conservative close time, run a manual cycle at dusk, then switch to automation for one night while you monitor alerts and camera logs.
Common Mistakes
One frequent error is installing the door without accounting for seasonal wood movement. Coops built from dimensional lumber can shift as humidity changes, which alters alignment. If the door uses a rigid track, even a small misalignment can increase friction and cause partial closure.
Another mistake is relying on Wi‑Fi cameras without a plan for outages. If your router reboots during a storm, the camera may stop recording or stop sending notifications. A local recording option, a cellular backup, or a scheduled check of the camera feed reduces the chance that you miss the only night you needed footage.
People also overestimate motion detection. Predators can move slowly, stay behind objects, or trigger only when they cross a narrow field of view. Adjust camera angles and test with harmless movement at night so you know what the system flags.
Finally, some keepers set lighting for egg production without tracking stress. If birds start roosting later, show more agitation at dusk, or reduce feed intake, the lighting schedule likely needs adjustment. A schedule change should be treated like a husbandry change, not a background setting.
FAQ
How Do I Prevent Door Jams?
Use end-stop feedback, keep the track clean, and inspect latch surfaces for corrosion. Test manual cycles after cold nights so you catch friction changes before automation runs unattended.
What Lighting Schedule Works Best?
Start with a gradual ramp and align light-off time with your birds’ routine. Track roosting behavior and egg counts for several days after each adjustment rather than changing multiple settings at once.
Do I Need A Camera If I Have Sensors?
Sensors tell you that something changed, while cameras show what happened. Many keepers use both so they can distinguish a false trigger from a real approach path.
How Should I Handle Power Outages?
Use a battery backup or UPS sized for the door controller and any connected devices. Test what happens when power returns mid-cycle, because some systems require a reset step.
Can Smart Apps Affect Coop Automation?
Yes. App permissions, account changes, and internet outages can interrupt sunrise/sunset timing or notifications. Keep a local timer option or manual override plan so automation still works when the phone app is unavailable.
Author's Insight
Automated coop doors, lighting timers, and security sensors share one theme: they depend on sensors, power stability, and predictable schedules. Reliability improves when you add feedback (end-stop detection), reduce single points of failure (power backup and manual override), and test under the same conditions you expect at night.
Security systems also depend on human response. A notification that arrives after you have already checked the coop loses value, so you need a clear action plan for alerts and a way to verify footage.
Because coop layouts vary, the most defensible approach is staged testing with notes on door travel time, lighting behavior, and alert accuracy. If you change one variable at a time, you can identify which component actually caused the change in bird routine.
Key Takeaways
- Choose automated doors with end-stop feedback and a manual override, then test multiple cycles in real outdoor conditions.
- Use lighting schedules that match your coop routine and avoid abrupt light changes; adjust gradually and track behavior.
- Build security in layers: detection plus a response plan, with camera placement that covers approach paths.
- Plan for power and connectivity failures, and verify how each device behaves during outages.