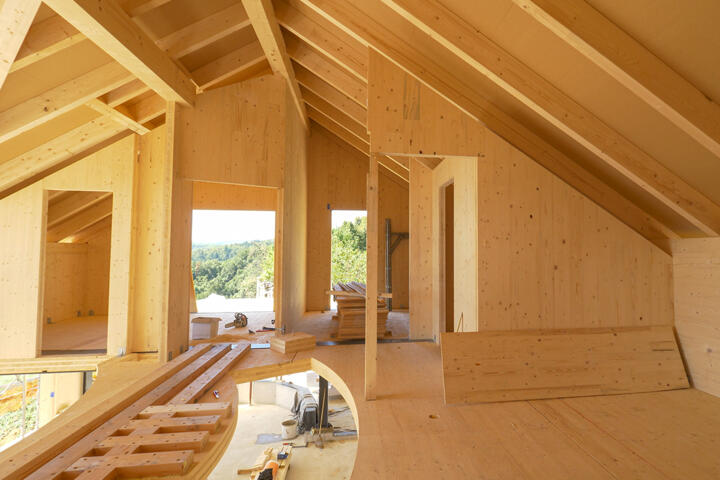
CLT Panels Vs Timber Frame
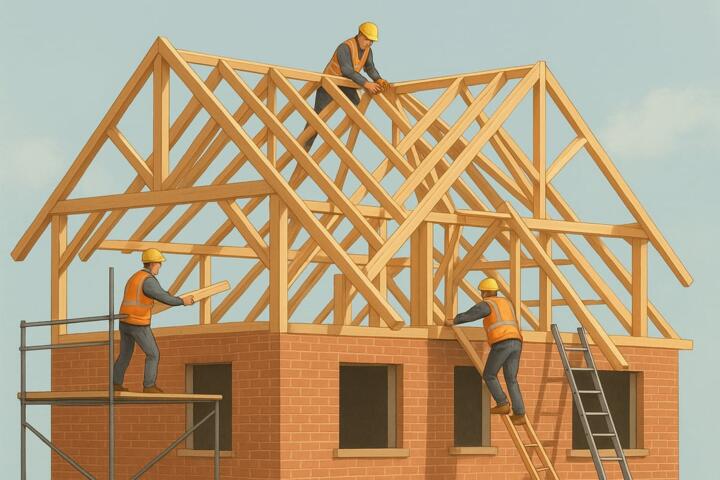
Cross-Laminated Timber (CLT) panels are factory-made wood boards stacked in alternating directions and pressed into large wall or floor elements. Traditional timber frame uses a skeleton of posts, beams, and bracing, with sheathing and insulation added to form the enclosure. Both systems rely on engineered wood and careful detailing, yet the build sequence and the weak points differ.
In a CLT wall, the panel often acts as both structure and part of the air-and-surface layer, depending on the design. In a timber frame wall, the frame carries loads while the insulation and sheathing layers handle most of the thermal and air-control functions. That difference changes how you plan for windows, services (wiring and plumbing), and the order of weatherproofing on site.
For example, a CLT floor may arrive as a large panel that lifts into place, then receives topping or a ceiling build-up. A timber frame floor typically starts with joists and bridging, then adds subfloor and finishes. The schedule impact depends on crane access, panel sizes, and how quickly the exterior envelope closes.
Common Misunderstandings
People often treat CLT as “just thicker plywood” or treat timber framing as “just smaller lumber.” Both shortcuts miss how load paths, stiffness, and connection design control performance. CLT panels behave like plate elements; timber frames behave like a braced frame with load transfer through joints and sheathing.
Moisture control is another frequent blind spot. CLT can be exposed during construction, but it still needs a plan for rain, condensation, and drying time. Timber frames also face drying and wetting risks, yet the cavity layers and sheathing can trap moisture if the sequence goes wrong. In both cases, the detailing around window openings and roof edges often determines whether water stays out or migrates into the assembly.
Fire and acoustics get oversimplified too. CLT can char predictably, but the fire rating depends on the full assembly: surface linings, cavity barriers, and penetrations. Timber frames can reach rated assemblies as well, yet the rating depends on the lining system and how gaps at service penetrations are sealed. Acoustic performance depends on mass, decoupling, and the floor/ceiling build-up, not only on whether the structure is CLT or timber.
Supporting technologies shape outcomes. CLT projects rely on engineered panel manufacturing tolerances, connection hardware, and crane logistics. Timber frame projects rely on bracing strategy, sheathing type, and the quality of air-sealing at junctions. If the design team swaps one of these assumptions late, the “system” stops behaving like the one described in the brochure.
How To Compare Them
Check Structural Assumptions
Start with the structural model and the connection schedule, not the wall thickness. Ask for the engineer’s basis for loads, including lateral loads (wind or seismic where applicable), floor live loads, and deflection limits. For CLT, request how openings are framed and how panel-to-panel and panel-to-foundation connections transfer forces. For timber frame, request the bracing layout and how sheathing contributes to racking resistance.
A practical tool here is a simple “load path map” from the drawings: where do lateral forces go, and which elements carry them? If the answer is vague, the project may rely on field adjustments that rarely show up in marketing diagrams. I’ve seen teams lose time because the crane plan assumed one panel layout, then the structural engineer required a different opening reinforcement pattern after shop drawings—this kind of change can ripple into the schedule.
For outcomes, you can expect that well-detailed CLT floors often reach stiffness targets with thinner build-ups than some timber solutions, but the exact numbers depend on span, panel thickness, and the chosen floor system. Timber frames can also meet stiffness targets, yet the deflection depends on joist spacing, bridging, and the subfloor/ceiling assembly.
Evaluate Envelope And Air Sealing
Ask how air tightness is achieved at each junction: wall-to-floor, wall-to-roof, and around window frames. In CLT designs, the panel may serve as a primary surface, but the air barrier still needs continuity through penetrations and service routes. In timber frame designs, the air barrier is often a membrane or sheathing layer, and the quality of tape/fastener detailing becomes a major driver.
Request the air-sealing strategy and the testing plan. Many projects aim for a blower-door target, but the specific number depends on local codes and the building’s heating/cooling strategy. If you see only “we will tape everything,” ask which tapes, which substrates, and how the contractor handles corners and transitions.
One small detail that matters: the order of installing membranes and weatherproofing. If the exterior is delayed, both systems can suffer from wetting, but timber frame cavities can dry differently than CLT panel surfaces. A site log from a previous project—sometimes shared by contractors—can reveal how they manage rain days and drying windows.
Plan Fire And Acoustic Details
For fire, ask for the rated assembly drawings, not just the structural material. The rating depends on linings, thicknesses, cavity barriers, and how penetrations are sealed. CLT can be left exposed in some designs, but many residential and commercial projects use linings to meet rating requirements and to control charring behavior at interfaces.
For acoustics, ask about the floor/ceiling system: is there a resilient layer, a floating floor, or a decoupled ceiling? Timber frames can perform well acoustically when the build-up includes mass and decoupling, yet rigid connections through the assembly can short-circuit sound isolation. CLT floors can also transmit sound through the panel; the chosen ceiling and any resilient layers control the outcome.
Realistic expectation: you rarely get “quiet” from structure alone. You get it from the whole assembly and the workmanship at junctions, especially around service penetrations and perimeter edges.
Compare Logistics, Cost, And Schedule
CLT projects often depend on panel delivery sizes, crane capacity, and weather windows. Ask for the lift plan, the staging area, and how panels are protected between delivery and enclosure. If you’re in a tight urban site, the crane schedule can dominate the timeline more than the design itself.
Timber frame projects can be more flexible on site because members are smaller and easier to handle, but the number of on-site steps can increase. That can affect labor hours for bracing, sheathing, membrane installation, and finishing. A contractor may quote a faster “shell” for CLT, yet the overall schedule can still hinge on windows, MEP rough-in, and drying of interior layers.
For cost comparisons, request itemized quotes that separate structure, envelope, connections/hardware, and finishing. CLT may show higher material costs but fewer on-site framing hours; timber frame may show lower panel costs but more labor for assembly and air barrier detailing. Without line-item clarity, quotes can hide the real drivers.
Educational Case Examples
Example 1: Small Infill House
An infill project in a constrained lot uses CLT for the ground and first-floor elements. The contractor schedules crane lifts over two days, then closes the exterior quickly. During shop drawing review, the engineer revises a window opening detail, requiring a different reinforcement layout; the panel supplier updates the shop drawings and delivery shifts by about a week. The homeowner’s main lesson: the schedule risk sits in the connection and opening detailing workflow, not only in the panel manufacturing lead time.
On the envelope side, the team uses a continuous air barrier strategy at wall-to-floor junctions and tapes membrane transitions around window frames. A blower-door test later shows the air barrier is continuous, but the team had to correct a few penetrations where service conduits passed through the lining. The outcome depends on workmanship at those “small” penetrations.
Example 2: Renovation With Timber Frame
A renovation adds a new upper level using a timber frame system. The design team chooses a braced frame with sheathing to resist lateral loads, then adds insulation and an air barrier membrane on the exterior side. The contractor experiences delays because the weatherproofing layer is installed after several rain events, and drying time becomes a constraint for insulation installation. The homeowner sees a longer schedule, yet the smaller member sizes make it easier to work around existing site access.
Acoustic performance becomes a focus because the new floor sits above a living area. The design includes a decoupled ceiling build-up and resilient detailing at the perimeter. The lesson here: even when the structure is “wood,” the quietness comes from the assembly choices and the sealing at edges.
Comparison Checklist
| Decision Factor | CLT Panels | Traditional Timber Frame | What To Ask |
|---|---|---|---|
| Primary Structure | Panel acts as plate element; connections govern load transfer | Frame carries loads; bracing and sheathing resist lateral forces | Show load path and connection schedule for openings and junctions |
| Air Barrier Strategy | Panel may be part of the air control layer; continuity at penetrations matters | Membrane or sheathing layer often forms the air barrier; tape/fastener detailing matters | Which layer is the air barrier, and how are corners and penetrations sealed? |
| Fire Rating | Depends on full assembly and linings; charring behavior is assembly-specific | Depends on lining system, cavity barriers, and sealed penetrations | Provide rated wall/floor/ceiling build-ups and penetration sealing details |
| Acoustics | Panel can transmit sound; ceiling build-up controls isolation | Isolation depends on decoupling and mass in floor/ceiling assemblies | Describe the floor/ceiling layers and how perimeter and services are detailed |
| Site Logistics | Crane lifts and panel protection drive schedule; openings require shop-drawing coordination | Smaller elements reduce lift constraints; more on-site steps for sheathing and membranes | Request lift plan, staging plan, and weatherproofing sequence |
Step-by-step checklist you can use with a contractor or designer:
- Ask for the structural drawings showing lateral load paths and the connection details at foundations, corners, and openings.
- Request the air barrier continuity plan and the blower-door test approach, including how penetrations are sealed.
- Ask for rated fire assemblies for each relevant wall and floor, plus details for service penetrations and cavity barriers.
- Review the floor/ceiling acoustic build-up, including resilient layers and how perimeter edges are treated.
- Compare quotes line-by-line: structure, envelope layers, connections/hardware, and finishing scope.
- Confirm site logistics: crane access, delivery protection, and the weatherproofing sequence for both systems.
Common Mistakes
One mistake is comparing only material names and ignoring assemblies. A CLT panel with the wrong lining and penetration sealing can perform poorly on fire or air tightness, while a timber frame with a well-designed lining and membrane can meet targets. The assembly is the unit of performance.
Another mistake is treating shop drawings as a formality. Opening sizes, reinforcement, and connection hardware often change after coordination with MEP and architectural details. If a contractor starts ordering materials before the shop drawing review cycle finishes, the project absorbs rework costs later.
Moisture sequencing errors also show up. Installing insulation before the exterior is fully weatherproofed can trap moisture in timber frame cavities. Leaving CLT exposed without a drying plan can create surface issues that complicate later finishes. A simple site rule—weatherproof before closing layers—sounds obvious, yet it fails when schedules compress.
Some teams skip blower-door testing because it feels like an extra step. Without testing, air leakage problems remain hidden until comfort complaints arrive, and the fixes then target the wrong layer. A test report with a date and method (for example, a blower-door measurement performed on 2026-03-14) gives you a baseline for follow-up repairs.
FAQ
Does CLT Reduce Construction Time?
CLT can shorten the structural shell phase because large panels arrive ready for installation, but the overall schedule still depends on crane availability, weatherproofing sequencing, and how quickly shop drawings resolve openings and connections.
Which System Handles Moisture Better?
Neither system “handles moisture better” by default. Performance depends on the construction sequence, drying time, and the continuity of the air and water control layers during and after installation.
How Do Fire Ratings Differ Between Them?
Fire ratings depend on the full wall or floor assembly, including linings, cavity barriers, and sealed penetrations. CLT’s charring behavior can be predictable, but the rating still hinges on the chosen build-up.
Are Acoustic Results Predictable?
Acoustic outcomes depend on the floor/ceiling build-up, resilient layers, and how rigid connections are avoided. Structure type alone does not predict sound transmission without the assembly details.
What Documents Should I Request?
Request structural drawings with connection details, air barrier and testing plans, rated fire assembly build-ups, and acoustic floor/ceiling layer descriptions. A clear itemized quote helps separate structure from envelope and finishing scope.
Author's Insight
CLT and traditional timber frame both rely on engineered wood behavior, yet they differ in how loads travel and how the enclosure layers are assembled. The most reliable comparisons come from reviewing the full drawings and assembly build-ups rather than comparing panel thickness or member sizes. In practice, the biggest risks often sit in junction detailing, penetrations, and construction sequencing, which affect air tightness, moisture tolerance, and fire/acoustic performance. If you want a quick way to judge a proposal, ask for the rated assemblies and the air-sealing plan, then check whether the quote covers those layers without gaps.
Key Takeaways
CLT panels and timber frames can both meet structural, fire, and energy goals when the design and assembly details match the intended performance. Use a checklist that focuses on load paths, air barrier continuity, rated build-ups, and acoustic floor/ceiling layers. Compare quotes line-by-line and confirm site logistics, because crane access and weatherproofing sequencing often drive real timelines. Treat shop drawings and penetration sealing as major work items, not paperwork.