Thermal Storage Basics
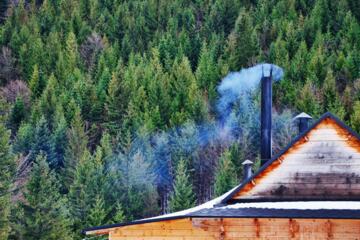
At its core, a masonry heater (or kachelofen) operates on the principle of thermal lag. While a standard iron woodstove radiates heat immediately and cools down just as fast, a masonry heater absorbs energy into its dense core. This process, known as "charging," allows the structure to stay warm long after the fire has gone out. You are essentially building a giant battery made of brick, soapstone, or refractory concrete.
In practice, a well-designed heater requires only one or two short, hot burns per day. During these burns, temperatures inside the firebox exceed 1000°C, ensuring nearly complete combustion with minimal particulate emissions. A typical Tulikivi soapstone heater, for example, can weigh between 1,000 and 3,000 kg, providing a steady heat flux of 2 to 3 kW for up to 24 hours.
Statistically, masonry heaters achieve 80% to 90% fuel efficiency, compared to the 60% average of EPA-certified wood stoves. Real-world testing by the Masonry Heater Association (MHA) shows that these units produce significantly lower creosote buildup, drastically reducing chimney fire risks and maintenance costs over the system's 50+ year lifespan.
Common Heating Pitfalls
The most frequent mistake homeowners make is treating a masonry heater like a standard fireplace. Frequent, small fires (smoldering) fail to "charge" the thermal mass and lead to inefficient combustion. Without reaching the critical temperature threshold, you lose the primary benefit of the system and waste fuel.
Another critical issue is poor structural planning. A 2,000 kg heater cannot simply be placed on a standard wooden subfloor. Failure to reinforce the foundation leads to settling, which causes cracks in the masonry. These cracks are not just aesthetic; they can leak combustion gases like carbon monoxide into the living space.
Ignoring the "thermal envelope" of the house is also a recipe for failure. If a masonry heater is placed against an uninsulated exterior wall, a significant portion of the stored energy radiates outside rather than into the room. This thermal bridging negates the high efficiency of the stone core.
Optimized Mass Heating
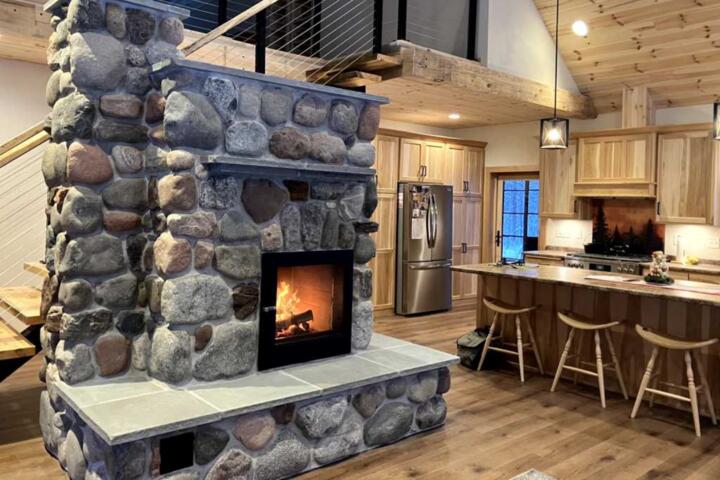
To maximize a masonry heater’s potential, you must integrate it into the architectural flow of the home. Placing the unit centrally allows it to radiate heat in 360 degrees, effectively serving as the primary heat source for multiple rooms. Open floor plans work best with this technology.
Invest in high-quality refractory materials. Using standard red bricks for the internal firebox is a mistake; you need high-alumina firebricks that can withstand repeated thermal shock. Companies like Temp-Cast or Maine Wood Heat provide specialized kits that ensure the internal geometry is optimized for maximum turbulence and heat transfer.
Incorporate a "bake oven" feature. Since the mass stays hot for hours, the secondary chamber remains at ideal temperatures for slow-cooking or bread baking long after the fire is out. This adds a layer of functional utility that offsets the initial high investment cost of the installation.
Practical Performance
Consider a 2,200 sq. ft. home in Vermont. A family replaced their propane furnace with a central soapstone masonry heater. Previously, they spent $3,500 annually on heating. After the $15,000 installation, their wood consumption dropped to 3 cords per year, sourced locally for $900. The system paid for itself in less than six years.
In another case, a custom-built brick heater in a Montana cabin utilized a "heated bench" (lebe) extension. By running the exhaust flues through a low masonry bench, the system provided a warm surface for sitting and drying gear. The owners reported that the indoor temperature fluctuated by only 2 degrees Celsius over a 24-hour period despite sub-zero outdoor temperatures.
Systems Comparison
| Feature | Masonry Heater | Iron Wood Stove | Pellet Stove |
|---|---|---|---|
| Heat Duration | 12–24 Hours | 2–4 Hours | Continuous (if powered) |
| Efficiency | 85–90% | 60–75% | 70–83% |
| Surface Temp | Warm (Safe to touch) | Scalding (Danger) | Hot |
| Electricity Needed | No | No | Yes (Auger/Fan) |
| Lifespan | 50+ Years | 10–15 Years | 5–10 Years |
Avoiding Execution Errors
Never paint the exterior of a masonry heater with standard latex paint. This traps moisture and creates a barrier that can peel or emit toxic fumes when heated. Use mineral-based pigments, lime washes, or ceramic tiles designed for high-heat environments to ensure the stone can "breathe."
Do not bypass the bypass damper. Most heaters have a small direct vent to start the draft. Forgetting to close this once the fire is established is a common error that sends all your potential heat straight up the chimney. Set a timer for 15 minutes after lighting to remind yourself to switch to "thermal storage mode."
Avoid using "green" or unseasoned wood. Even the best masonry heater cannot overcome the physics of wet wood. Moisture consumes energy during evaporation, lowering firebox temperatures and preventing the mass from fully charging. Aim for a moisture content below 15% using a digital moisture meter.
FAQ
How long does it take to heat up?
From a cold start, it can take 4 to 6 hours for the exterior surface to feel warm. However, once seasoned and in daily use, the "base" temperature of the stone never drops to room temperature, providing instant radiant comfort upon lighting the next fire.
Is it safe for children?
Yes, one of the biggest advantages is safety. The external surface typically stays between 40°C and 60°C. It is uncomfortably warm but will not cause third-degree burns on contact, unlike the 200°C+ surfaces of metal stoves.
Can I build one myself?
While DIY kits exist, the internal complex flue geometry is unforgiving. A mistake in the smoke path can lead to carbon monoxide poisoning. It is highly recommended to work with a certified MHA heater smith for the core construction.
Does it require a lot of wood?
No, it actually uses significantly less. Because you are burning a small amount of wood very quickly and storing all the heat, you avoid the "fuel-gulping" nature of 24/7 smoldering fires found in traditional stoves.
Will it heat my entire house?
In a well-insulated, open-concept home, a centrally located heater can serve as the sole heat source. In older, compartmentalized homes, it may require supplemental heating for distant bedrooms or "back-end" plumbing areas.
Author’s Insight
In my twenty years of observing sustainable heating trends, I’ve found that masonry heaters are the only technology that truly honors the "set it and forget it" lifestyle while remaining off-grid. I once lived with a Finnish-style heater during a week-long power outage in a blizzard; while neighbors struggled with freezing pipes and loud generators, our home remained a steady 21°C with just two fires a day. My best advice: prioritize the location of the heater during the blueprint stage—don't try to squeeze it in as an afterthought.
Summary
Masonry heaters offer an unparalleled combination of efficiency, safety, and comfort by leveraging the natural properties of thermal mass. To succeed, focus on high-quality refractory materials, central placement within your home's layout, and a disciplined approach to fast, hot burns. If you are looking for a lifelong heating solution that reduces carbon footprints and energy bills, a masonry heater is the gold standard. Start by consulting a certified installer and ensuring your floor joists are ready for the weight of a true stone hearth.