How Pipes Freeze
Pipes freeze when water inside them loses heat faster than it can be replaced. The freezing point is 32°F (0°C), but pipes can start cracking from ice expansion after a period of cold, even if the outdoor temperature later rises. Long runs through unheated spaces freeze first, especially where water sits still. A slow trickle can keep water moving, while a dead-end line can freeze even when nearby areas stay warmer.
Cold air infiltration matters as much as the thermometer reading. Exterior wall cavities, rim joists, and crawl spaces often have drafts that pull heat from pipe surfaces. Insulation helps, but only if it covers the pipe fully and stays dry. Heat loss also increases when pipes are exposed to wind or when insulation is missing around elbows and valves, which are common weak points.
Many homes also have “supporting dependencies” that affect freeze risk. A poorly sealed sill plate, a vented crawl space, or a malfunctioning furnace air handler can change how warm the surrounding air stays. If you have a water heater set to a low temperature, hot water recovery can lag, and the first draw after a long idle period may cool the line faster. On the plumbing side, shutoff valves and supply lines to fixtures can trap water, which freezes sooner than the main run.
Main Problems And Pain Points
People often focus on the outdoor low temperature and ignore how long the cold lasts. A brief dip below freezing may not freeze a pipe, while a multi-hour cold spell with wind can. Another common mistake is insulating the visible pipe but leaving gaps at joints, where heat escapes through thin spots. Foam sleeves also fail when they get wet, since wet insulation conducts heat more readily.
Some advice online suggests wrapping pipes with random materials or using space heaters without a plan. That can create fire risk or leave the pipe cold because the heater warms the air but not the pipe surface. Others rely on “set and forget” thermostat settings, then discover the furnace cycles off during the coldest hours. If the home has zones, a closed damper or a malfunctioning thermostat can leave one area much colder than the rest.
Freeze prevention also depends on plumbing layout. A basement manifold, a crawl space line, or a line that runs through an exterior wall can behave differently from a pipe in an interior wall. If you have a hose bib connected to an indoor shutoff, the hose bib side can freeze even when the interior line stays above freezing. The same pattern shows up with outdoor sprinklers and irrigation lines, where water may remain in low points.
Solutions And Advice
Insulate With Coverage In Mind
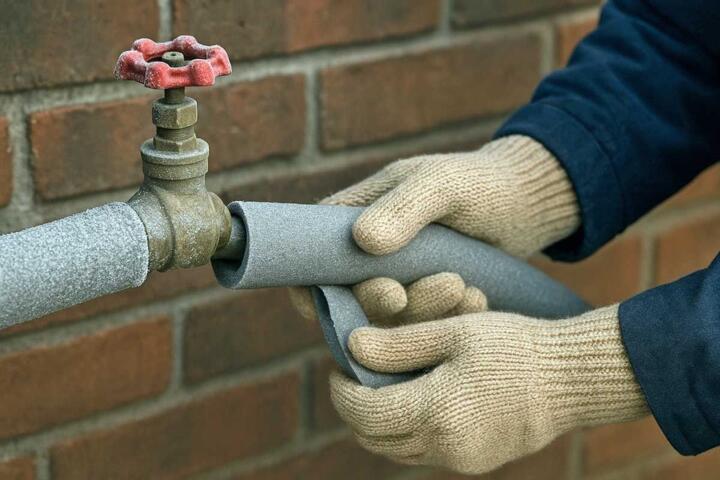
Use pipe insulation rated for the temperatures you expect, and wrap it so it fully contacts the pipe. Pay extra attention to elbows, tees, and valve bodies, because those fittings lose heat faster than straight runs. If the pipe runs through an exterior wall cavity, seal the wall penetration around the pipe before insulating, since drafts can bypass insulation. In a garage or crawl space, add a vapor barrier or weather-resistant wrap if the area gets damp, since wet insulation loses performance.
A practical check: after insulating, look for seams where cold air could reach the pipe. If you can see daylight at a joint or you can feel a draft through a gap, the insulation is doing less than you think. For a small aside, many homeowners discover the weak spot after a storm when they notice a cold air stream near the rim joist, then trace it to a missing seal around a plumbing penetration.
Use Heat Safely When Needed
For pipes that cannot be insulated well, heat tape or heat cable can reduce freeze risk. Follow the manufacturer’s instructions for placement, wattage, and whether the cable is self-regulating. Do not plug a heat cable into an extension cord unless the instructions explicitly allow it, since extension cords can overheat. Use a GFCI outlet where required by local electrical code, and keep the cable away from standing water.
Set a timer or thermostat if the system supports it, but avoid running heat tape continuously without guidance. Heat tape is designed for freeze protection, not for thawing a fully frozen pipe. If you suspect freezing, thawing should be done carefully to avoid pipe damage, and you should stop if you see swelling, leaks, or water backing up.
As a small detail, I have seen homeowners buy heat tape with the wrong voltage rating for their outlet, then wonder why it never warms. Checking the label before installation saves time and prevents a false sense of security.
Drip Or Run Water During Cold Spells
A slow drip can keep water moving in a vulnerable section, which reduces the chance of ice forming. Use the smallest flow that still produces movement, since a steady trickle can waste water. If you have a single fixture fed by a long run, dripping that faucet may protect the line better than dripping every tap. For homes with a known problem area, drip from the fixture closest to the vulnerable pipe segment.
Plan for the duration of the cold. If the forecast calls for freezing temperatures overnight and the line is known to freeze, start dripping before the temperature drops, not after you hear cracking or see frost. Many people underestimate how quickly a pipe can freeze when wind chills increase heat loss.
Drain Or Shut Off When You Can
For seasonal homes, outdoor plumbing, or lines that you can isolate, draining can prevent ice formation. Shut off the water supply to the outdoor line, open low points or drain valves, and remove hoses. For irrigation systems, follow the manufacturer’s winterization steps, since trapped water in sprinkler heads and backflow devices can freeze. If you drain indoor lines, confirm that you do not leave water trapped in a section that cannot drain.
When you shut off water, label the valves and keep a simple note of which fixtures are affected. A mild frustration many homeowners report is returning in spring and forgetting which valve was closed, then spending an hour troubleshooting a “leak” that is actually a shutoff.
Case Examples
Example 1: Crawl Space Supply Line
A family in a cold region noticed that the kitchen faucet sometimes stopped producing water during extended freezes. The supply line ran through a vented crawl space with a drafty rim joist. They sealed the rim joist penetration around the pipe, added insulation that covered the pipe and fittings, and wrapped the insulation with a weather-resistant layer. During the next cold spell, they used a small drip from the kitchen faucet for the first night while the insulation settled and stayed dry. The faucet continued to run, and the crawl space stayed free of visible frost on the pipe.
Example 2: Outdoor Hose Bib And Dead-End
A homeowner insulated the visible section of an exterior hose bib but still found a frozen section after a windy night. The issue came from water trapped between an indoor shutoff valve and the hose bib, which froze even though the main interior line stayed warm. They insulated the section between the shutoff and the exterior connection, then replaced a missing seal around the wall penetration. They also removed the hose and drained the hose bib using the built-in drain. After that, the outdoor line stayed unfrozen during similar temperatures.
Comparison Checklist
| Approach | Best For | Limits | Decision Tip |
|---|---|---|---|
| Pipe insulation | Exposed runs in garages, crawl spaces, exterior walls | Needs full coverage and dry conditions; gaps at fittings reduce performance | Inspect elbows, tees, and valve bodies; seal drafts before insulating |
| Heat tape or cable | Pipes that cannot be insulated well or are in high-risk spots | Not a substitute for thawing; electrical safety rules apply | Match voltage and wattage to the product label; follow placement instructions |
| Dripping water | Short-term freeze risk for a specific fixture line | Consumes water; may not protect long dead-end sections | Drip the faucet closest to the vulnerable run; start before the coldest hours |
| Drain and shutoff | Seasonal homes, outdoor lines, irrigation systems | Can leave trapped water if valves are not positioned correctly | Confirm low points drain; label valves and fixtures affected |
Step-by-step quick plan:
- Identify the coldest plumbing runs by checking where pipes pass through exterior walls, crawl spaces, and unheated basements.
- Seal drafts at pipe penetrations before adding insulation, since insulation works best when air movement is reduced.
- Insulate straight runs and fittings, then verify insulation stays dry during typical winter conditions.
- For high-risk sections, add heat tape with correct electrical setup or use a controlled drip during the coldest window.
- For outdoor and seasonal lines, drain and isolate water, then remove hoses and open drain valves.
Common Mistakes
One frequent error is insulating over a wet pipe or in a damp cavity. Insulation can trap moisture against the pipe, which increases heat loss and can lead to corrosion over time. Another mistake is using insulation that is too thin for the temperature range, then assuming it will “slow down” freezing indefinitely. Heat loss continues, and thin insulation can still allow ice to form during long cold spells.
People also skip the fittings. Elbows, tees, and valve stems often freeze first because they have more surface area and less uniform insulation contact. A third mistake involves heat tape misuse, such as covering it with materials not rated for that purpose or running it without a GFCI where required. Electrical code requirements vary by location, so follow the product instructions and local rules rather than guessing.
Finally, some homeowners try to thaw a frozen pipe by applying heat too aggressively. Rapid heating can damage plastic or solder joints, and forcing water through a blockage can worsen the problem. If you see swelling, leaks, or water backing up, stop and switch to a safer approach, which may include calling a plumber.
FAQ
How cold does it need to be
Pipes can freeze at 32°F (0°C) and below, but wind, drafts, and pipe exposure time often matter more than a single thermometer reading.
Does pipe insulation stop freezing
Insulation slows heat loss, so it reduces freeze risk when paired with draft sealing and dry conditions, but it does not guarantee protection during prolonged extreme cold.
Can I use heat tape safely
Heat tape can reduce freeze risk when installed exactly as the manufacturer specifies, including correct voltage, placement, and electrical safety steps such as GFCI use where required.
How much should I drip
A slow trickle that keeps water moving in the vulnerable line is usually enough; dripping every faucet wastes water and often does not protect the specific dead-end section that freezes.
What if a pipe already froze
Thaw carefully using safe methods such as warming the pipe gradually from the outside, and stop if you see leaks or swelling; persistent blockage may require professional help.
Author's Insight
Freeze prevention works best when you treat it as a heat-loss problem, not a guess about the weather. Insulation reduces heat transfer, draft sealing reduces air-driven heat loss, and controlled water movement reduces the time water sits still. Heat tape can add targeted warmth, but it depends on correct electrical setup and proper placement. Draining and shutoff steps prevent ice formation in lines that can be isolated, yet trapped water in dead-end sections remains a common failure point. If you are planning changes, map your plumbing routes first, then choose one or two methods that match the risk level of each run.
Key Takeaways
- Freeze risk depends on exposure, drafts, and time, not only the outdoor low temperature.
- Seal pipe penetrations and insulate fittings, not just straight runs.
- Use heat tape only with correct product instructions and electrical safety practices.
- Drip a vulnerable line during the coldest window, and drain outdoor or seasonal lines when you can isolate them.
- If a pipe freezes, thaw gradually and stop if you see damage, since forcing water can worsen leaks.