How off-grid water works
An off-grid water system moves water through a chain: source, intake, treatment, storage, and distribution. A typical setup starts with a well, spring, or rain catchment, then uses a pump or gravity head to move water to a pressure tank or holding tank. Treatment often includes sediment filtration, disinfection, and sometimes media filtration for taste, color, or specific contaminants. Distribution then feeds fixtures through plumbing sized for flow and pressure, with pressure switches or regulators controlling pump cycling.
Water quality drives the design. In the U.S., the Safe Drinking Water Act sets enforceable limits for many contaminants in public systems, but off-grid users usually must test and respond on their own. Many households also face seasonal changes: groundwater levels shift, surface sources warm, and biofilm can build in tanks and lines. If you run a cabin in winter, freeze protection becomes part of the system design, not an afterthought.
Skip the “set and forget” idea. It fails because water chemistry changes over time.
System choices reflect common constraints. Electricity availability affects pump selection and whether you need a battery-backed controller. Water demand affects tank sizing; a small pressure tank may handle short draws, while a larger storage tank can buffer pump runtime. In many regions, rainwater harvesting is growing because households want independence from utility rate changes, and because remote properties often lack reliable service. Workforce and learning trends also matter: more people take short online courses on plumbing, well maintenance, and water testing, but those courses vary widely in depth and lab guidance.
Evidence-based fact: disinfection methods reduce microbes, but they do not remove dissolved chemicals. Evidence-based fact: sediment filters protect downstream equipment, yet they do not replace chemical treatment for pathogens. Those two points explain why many systems use both filtration and disinfection rather than one “magic” device.
In practice, the system behaves like a small water utility with fewer redundancies. When one component drifts out of spec, the whole chain can degrade. That is why the workflow matters: source protection, routine testing, and maintenance schedules tied to actual measurements.
Common pain points
People often misdiagnose water problems because symptoms show up after treatment, not at the source. Cloudiness, bad taste, or staining can originate from iron and manganese, disturbed sediments, or biofilm in storage. If you only swap a filter without checking disinfectant performance, you can keep pushing contaminated water through the system. Another frequent mistake is assuming that a new filter guarantees safety; filters clog, channels form, and seals age.
Data flow errors cause many failures. Water can bypass a cartridge if housings are installed incorrectly, and backflow can move contaminants into the line when a check valve fails. In systems with both gravity and pumped sections, pressure changes can pull air into lines, which then affects pump cycling and can damage components. When a pressure switch short-cycles, the pump runs more often, which increases wear and can stir sediment in the well.
Skip the “guess the cause” habit. It wastes money and delays safety fixes.
Real-world scenario: a family installs a 20-micron sediment filter and a carbon filter for taste. After a few months, the water smells “earthy” and the filter pressure drop rises. The likely causes include biofilm growth in the tank, disturbed sediment in the source, or exhausted carbon. If they only replace carbon, the smell may return because the underlying microbial or source issue remains.
Another scenario: a cabin uses a spring feed with a UV unit. UV inactivates microbes, but it depends on water clarity and correct lamp output. If the spring carries more fine sediment after storms, UV transmittance drops, and the same UV dose no longer matches the design. Without turbidity monitoring, the system can drift into under-treatment.
Freeze damage also creates hidden risks. Cracked housings or split pipes can leak water into insulation cavities, and that moisture can promote corrosion and mold. A small leak can also reduce pressure, which changes how filters and disinfection units operate.
Solutions and recommendations
Start with the water source
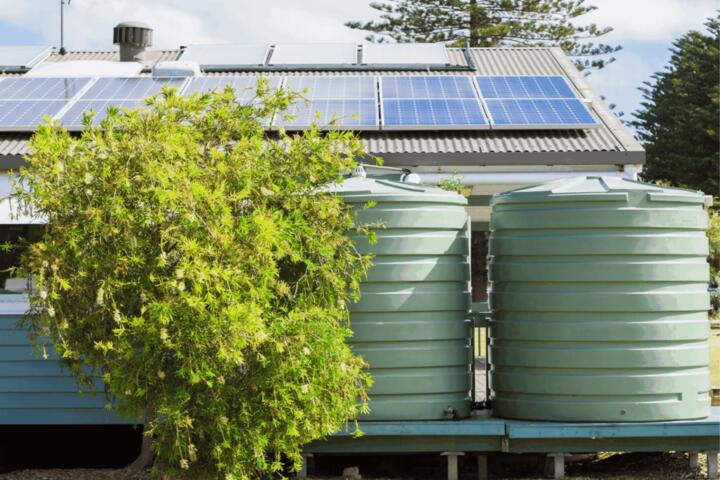
Begin by identifying the source type: well, drilled borehole, dug well, spring, or rain catchment. Each source has different contamination pathways. Groundwater often carries dissolved minerals like iron, manganese, or hardness, while surface sources can carry higher microbial loads after rainfall. Rainwater systems depend on roof condition, first-flush diversion, and storage hygiene.
Why it works: source characterization determines which treatment steps belong upstream versus downstream. What it looks like: you map the shortest path from source to treatment, then protect it with sanitary seals, grading, and setbacks. Tools and methods: use a local well log if available, and run baseline lab tests before buying equipment. Many labs offer panels that include bacteria indicators and common chemical parameters; choose a panel that matches your source and region.
Outcome target: you want a baseline so later tests can detect drift, not just “pass or fail.”
Size storage and pressure
Storage and pressure control affect both comfort and component life. A pressure tank reduces pump cycling for short draws, while a larger storage tank can provide a buffer for treatment units. If you oversize the tank, water can sit longer, which can increase biofilm risk in some setups. If you undersize storage, the pump runs frequently, which can shorten pump and switch life.
Why it works: pump runtime and water residence time change microbial growth and maintenance intervals. What it looks like in practice: you measure typical daily use, then estimate peak flow during showers and laundry. Tools: flow rate tests from fixtures and a simple pump run-time log help you refine assumptions. A practical starting point is to track pump cycles for 3–7 days, then compare against the pump’s rated cycling limits.
Skip the “rule of thumb only” approach. It ignores your actual draw pattern.
Match filtration to contaminants
Filtration choices should match the contaminant type. Sediment filters protect equipment and reduce turbidity, but they do not remove dissolved salts or pathogens reliably by themselves. Carbon filters can improve taste and odor and can reduce some organic compounds, but carbon needs replacement schedules and pre-filtration to prevent channeling. Media filters like greensand or catalytic carbon can target specific dissolved metals, but they require backwashing and regeneration chemistry.
Why it works: different contaminants require different mechanisms—size exclusion, adsorption, ion exchange, or oxidation. What it looks like: you install a pre-filter upstream of carbon or UV to keep water clear, then you monitor pressure drop as a clogging indicator. Tools: use differential pressure gauges on housings and record readings weekly during the first month. Many systems show a rising pressure drop as the filter loads; a sudden jump can signal a source disturbance.
Outcome target: stable pressure drop and stable water clarity after storms.
Choose disinfection with limits
Disinfection methods include chlorination, UV, and ozone, each with constraints. Chlorine can provide residual protection in storage and distribution lines, but it depends on contact time and can create taste issues if dosing is off. UV inactivates microbes without leaving a chemical residual, but it depends on water clarity and lamp performance. Ozone is strong but requires careful control and off-gas handling.
Why it works: disinfection targets microbes, not dissolved chemicals. What it looks like: you verify contact time for chlorination using system volume and flow rate, or you verify UV performance using sensor readings tied to transmittance. Tools: a simple test kit for free chlorine can help for chlorinated systems, while UV units often include intensity or dose indicators. Mild frustration is common here—many owners read the manual once and never check sensor logs.
Outcome target: consistent disinfection performance under real flow conditions.
Test on a schedule you can keep
Testing turns water safety from guesswork into measurable control. At minimum, many households test for bacteria indicators and key chemical parameters relevant to their source. If you use a chlorination system, you also test free chlorine at the tap and check dosing equipment. If you use UV, you track lamp hours and verify clarity conditions.
Why it works: contaminants can change after storms, pump repairs, filter replacements, or seasonal shifts. What it looks like: you set a calendar tied to events, not just dates. Tools: lab kits for periodic sampling and in-home meters for basic checks like pH and turbidity. A practical approach is baseline testing first, then repeat after major maintenance, then at a fixed interval such as quarterly or semiannual depending on risk and local guidance.
Skip the “test only when something tastes off” plan. It delays detection until after exposure.
Plan power and freeze protection
Off-grid systems often rely on solar, wind, or generators, so power stability affects pump and control electronics. A pump that loses power mid-cycle can leave water in lines, which then freezes or contaminates if backflow occurs. Freeze protection includes insulating above-ground pipes, using heat tape where appropriate, and draining low points during extended shutdowns.
Why it works: mechanical failure from freezing can crack housings and compromise seals. What it looks like: you map pipe runs, identify low points, and confirm that check valves and drain valves function. Tools: temperature sensors for critical lines and a written “winter mode” checklist. A small aside: I’ve seen owners install heat tape but skip insulation thickness calculations, so the tape runs constantly and still misses cold spots.
Outcome target: no frozen lines after the coldest week you expect.
Keep a maintenance log
Maintenance becomes easier when you track what changed and when. Record filter model and change date, pressure drop readings, UV lamp hours, chlorine dosing settings, and any repairs to pumps or valves. When water quality shifts, the log helps you connect the change to a specific component. It also helps you avoid replacing parts too early or too late.
Why it works: many failures show up as gradual drift—clogging, biofilm, sensor aging—before they become obvious. What it looks like: a one-page spreadsheet or notebook with columns for date, readings, and observations. Tools: a smartphone photo of the installed configuration and serial numbers, plus a simple checklist for each service visit. If you have multiple tanks, label them so you do not mix up “raw” and “treated” lines during filter swaps.
Outcome target: predictable maintenance intervals and faster troubleshooting.
Case examples
Spring feed with UV and storms
A remote property uses a spring feed with a UV unit and a 20-micron sediment filter. After heavy rain, the water turns slightly hazy and the UV alarm light flickers. The owner checks turbidity and finds it higher than usual, then inspects the pre-filter and sees rapid clogging. They replace the pre-filter, confirm UV sensor readings, and add a larger pre-filtration stage for storm periods. The system returns to stable clarity once the spring settles, but the owner keeps a storm checklist because the issue repeats after similar rainfall.
Well water with iron and taste
A household on a drilled well reports reddish staining and a metallic taste. Lab results show elevated iron and manganese, while bacteria indicators remain low. They install a treatment train that includes sediment filtration plus a media step designed for dissolved metals, then they backwash on a schedule based on pressure drop. Over 6–8 weeks, staining reduces and the taste improves, but the owner continues periodic lab testing because iron treatment can change with water chemistry. They also verify that the disinfection step still meets microbial safety goals, since metal removal does not replace pathogen control.
Comparison table and checklist
| Component choice | What it targets | Main limitation | What to measure |
|---|---|---|---|
| Sediment filter | Turbidity, particles, protects downstream units | Does not remove dissolved chemicals or guarantee pathogen control | Pressure drop, turbidity trend |
| Carbon filter | Taste/odor, some organics | Clogs or channels if pre-filtration fails | Flow rate, taste/odor checks, change intervals |
| UV disinfection | Microbe inactivation | Performance drops with poor clarity and aging lamps | Lamp hours, sensor/dose indicators, turbidity |
| Chlorination | Microbe inactivation with residual | Requires correct dosing and contact time; taste issues possible | Free chlorine at tap, contact time estimate |
Checklist for a new system start-up:
- Run baseline lab tests for bacteria indicators and relevant chemicals for your source.
- Verify plumbing layout: no bypasses, correct valve orientation, and working check valves.
- Measure flow rates at fixtures to confirm pump and treatment sizing.
- Set disinfection parameters using manufacturer guidance and your measured flow.
- Record initial pressure drop, turbidity, and disinfection sensor readings.
- Schedule follow-up testing after 2–4 weeks and after any major maintenance.
Common mistakes
Skipping baseline lab testing
Why it happens: owners buy equipment based on taste complaints or online anecdotes. Impact: they install filters that do not target the actual contaminant, then they miss microbial risks. How to avoid it: request a panel matched to your source type and local concerns, then repeat testing after changes.
Assuming a new filter fixes everything
Why it happens: filters feel like “the solution,” and the cartridge replacement date looks like progress. Impact: biofilm and disinfection failures persist, and dissolved contaminants remain. How to avoid it: track pressure drop and water clarity, then verify disinfection performance with the right test method.
Ignoring UV clarity requirements
Why it happens: owners focus on lamp replacement schedules and skip turbidity checks. Impact: UV under-dosing can occur during storms or after sediment disturbances. How to avoid it: add pre-filtration sized for storm conditions and monitor turbidity or UV sensor readings.
Overlooking backflow and plumbing layout
Why it happens: check valves get installed once and never inspected. Impact: contamination can move into treated lines during pressure loss. How to avoid it: test for pressure stability, inspect valves during maintenance, and confirm no cross-connections exist.
Neglecting freeze-mode planning
Why it happens: seasonal shutdown feels temporary, so people skip a written winter procedure. Impact: cracked housings, leaks, and corrosion can appear after the first thaw. How to avoid it: label drain points, confirm insulation coverage, and test the system after cold snaps.
FAQ
Do off-grid systems need disinfection?
Many off-grid systems need disinfection because filtration alone does not reliably control pathogens. The need depends on the source: surface water and many spring sources carry higher microbial risk, while some groundwater sources still require treatment. If you use UV or chlorine, you must match the system design to measured water clarity and flow. If you do not disinfect, you still need strong source protection and routine bacteria testing, because contamination can change after storms or repairs.
How often should I test my water?
A practical schedule starts with baseline lab testing, then repeat testing after major changes like pump repairs, filter upgrades, or seasonal transitions. After that, many households test at intervals such as quarterly or semiannual, depending on risk and past results. If you use chlorination, test free chlorine at the tap more frequently than lab tests. If you use UV, track lamp hours and verify clarity conditions, since performance depends on water transmittance.
What does a pressure tank actually do?
A pressure tank stores a small volume of pressurized water so the pump does not start for every faucet opening. It reduces pump cycling and helps maintain steadier pressure at fixtures. The tank’s air charge and the pressure switch settings determine how often the pump runs. If the tank is mischarged, you can get rapid cycling, pressure swings, and faster wear on the pump and switch.
Can rainwater be safe for drinking?
Rainwater can be safe for drinking when the system manages roof contamination, first-flush diversion, filtration, and disinfection. Roof materials, debris, and bird droppings can introduce microbes and organic matter. Storage hygiene matters because biofilm can form in tanks. A safe design usually includes sediment filtration plus disinfection, then periodic lab testing for bacteria indicators and relevant chemicals based on local conditions.
Why does my water taste different after filter changes?
Taste changes often come from carbon media exhaustion, disturbed biofilm, or changes in flow through the treatment train. When you replace cartridges, you can also alter contact time for disinfection units, especially if the system has variable flow. If taste changes coincide with a pressure drop spike, the filter may be channeling or not seated correctly. If taste changes persist, test for chlorine residual or UV performance indicators and consider a lab check.
Author's Insight
Off-grid water systems behave like a chain, so one weak link shows up as a pattern: pressure drift, clarity changes, or inconsistent disinfection readings. I’ve seen owners chase symptoms at the tap while the real issue sat upstream in pre-filtration or valve orientation. A small detail like a UV sensor reading from firmware version 1.3.2 can reveal under-treatment long before taste complaints. Keep your maintenance log tidy, because troubleshooting without it turns into guesswork.
Key takeaways
- Start with baseline water testing tied to your source type, then design treatment around measured contaminants.
- Use filtration for particles and disinfection for microbes; one step rarely covers both.
- Track pressure drop, turbidity, and disinfection indicators after storms and after maintenance.
- Plan for power loss and freezing with a written winter mode checklist.
- Maintain a log so you can connect water quality changes to specific component changes.