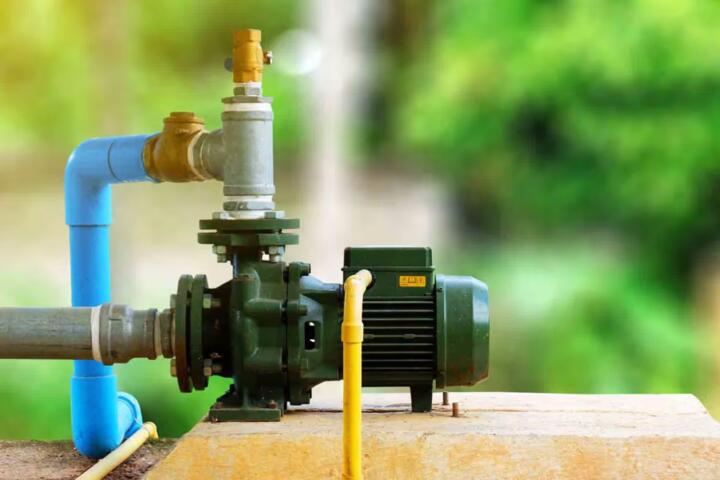
Well Pump System Basics
A well pump system turns groundwater into household water by combining a submersible or jet pump with pressure control and storage. The pump draws water from the well, then pushes it through plumbing until the pressure control tells it to stop. Most homes use a pressure tank to reduce pump cycling and a pressure switch or control to start the pump when pressure drops. A check valve prevents water from flowing backward toward the pump when the pump stops. If you’ve ever heard the pump kick on every few minutes, you’re hearing the system respond to pressure changes, not “random noise.”
In a typical setup, the well pump sits below the water level in the well (submersible) or draws water from above the well (jet). Submersible pumps are common for deeper wells because they can be placed down in the borehole. Jet pumps usually sit at the surface and rely on suction and a priming process, which makes them more sensitive to air leaks. Either way, the pump’s job stays the same: convert electrical energy into water flow against resistance in the piping.
Pressure control usually includes a pressure switch with cut-in and cut-out settings, such as 30/50 psi or 40/60 psi. When you open a faucet, pressure drops as water leaves the tank and plumbing. Once pressure reaches the cut-in point, the switch signals the pump to start. When demand stops, pressure rises as the tank refills, and the switch turns the pump off at the cut-out point. That cycle repeats, and the tank size and pre-charge settings strongly affect how often it happens.
Water storage in the pressure tank is not “water in a bladder” by magic; it’s compressed air separated from water by a diaphragm or bladder. As the pump runs, water enters the tank and compresses the air cushion. When you draw water, the compressed air pushes water back out. If the air charge is wrong, the tank may hold less usable water, and the pump may cycle more frequently. I once saw a tank that had been “recharged” with the wrong gauge type, and the cycling pattern never matched the homeowner’s expectations after that.
Common Failure Points
People often misread symptoms because the system has multiple layers that can fail in different ways. A pump that runs but doesn’t deliver water can point to a loss of prime (jet systems), a clogged screen, a broken impeller, or a failed check valve. A pump that cycles too often usually points to a pressure tank issue, a waterlogged tank, a small leak, or an incorrect pressure switch setting. A pump that won’t start can involve electrical problems like a tripped breaker, a failed capacitor, a worn pressure switch, or a control board fault.
Pressure tank problems are a frequent culprit because the tank’s air charge and internal bladder condition determine how much water the system can store between pump cycles. If the tank loses its air charge, the tank behaves like a plain container with minimal drawdown, so pressure drops quickly and the pump starts again. If the bladder or diaphragm ruptures, water fills the tank and the air cushion disappears. That often shows up as rapid cycling, short run times, or pressure that swings noticeably when you use water.
Another dependency is the well itself. A well can produce less water during drought, seasonal changes, or after sediment buildup. Pumping a low-yield well can cause the pump to run dry, which can overheat the motor and shorten lifespan. Submersible pumps often include built-in thermal protection, but that does not fix the underlying low-water condition. If the pump runs and then stops repeatedly with no water output, the cause may be electrical protection, a control setting, or a water supply issue.
Plumbing leaks also confuse diagnosis. A small leak in a toilet fill valve or a hidden pipe can keep pressure from reaching the cut-out point, so the pump runs longer than expected. Conversely, a leak on the suction side of a jet pump can introduce air, which reduces flow and can trigger priming failures. Many homeowners chase the pump when the pressure drop is actually coming from a leak somewhere downstream.
How To Troubleshoot Safely
Start With Observations
Write down what the system does during a typical water use event: how long the pump runs, whether pressure fluctuates, and how quickly it cycles after you close a faucet. Note the pressure gauge reading if you have one, and compare it to the switch’s cut-in/cut-out range. If the pump starts immediately after a faucet closes, the tank may not be holding pressure. If the pump never starts, check whether the breaker is on and whether any control lights indicate a fault.
For a quick sanity check, watch the pressure gauge while someone runs water. If pressure drops below the cut-in point and the pump starts, the pressure switch is likely responding. If pressure drops but the pump does not start, the issue may be electrical or control-related. If pressure stays stable while water is flowing, the system may be using stored tank water and the pump may not need to run yet.
Test Tank And Switch Behavior
Inspect the pressure tank for signs of waterlogging, such as water coming from the air valve or a tank that feels unusually heavy. If your system has a Schrader-style air valve, you can measure the pre-charge pressure with a tire gauge after turning off power and relieving system pressure. Pre-charge is typically set about 2 psi below the cut-in pressure, but follow the tank manufacturer’s instructions because some tanks and switch settings differ. On a 30/50 psi system, that often means around 28 psi pre-charge, though the exact target depends on the cut-in value and the tank design.
Check the pressure switch contacts for signs of wear or pitting if you have the tools and experience to do so safely. Many pressure switches also have a differential adjustment or a range setting, and incorrect settings can cause short cycling. If you see a switch that has been adjusted without documentation, record the current settings before changing anything. A small aside from field practice: pressure switch labels sometimes fade, and the homeowner’s memory of “it used to be 30/50” can be wrong after a prior service call.
Check Flow Path And Valves
Verify that the check valve is functioning by observing whether pressure drops rapidly after the pump shuts off. A failed check valve can allow water to drain back toward the well, which forces the pump to restart sooner. If you have a submersible pump, the check valve is often located near the pump discharge or in the well head area. If you have a jet pump, check valves may be part of the suction/prime path. A clogged filter or closed valve can also mimic pump failure by restricting flow.
Look for partially closed shutoff valves on the supply line, especially after maintenance. A valve left in a half-open position can reduce flow enough that the pump runs longer and pressure readings become inconsistent. If your system includes a sediment filter or softener, check whether the filter is overdue for service; a clogged filter can increase pressure drop and change pump cycling.
Use Electrical Safety Rules
Pump systems involve lethal voltage, so shut off power at the breaker before opening electrical enclosures. Confirm power is off with a meter if you have one, and avoid working in wet areas. If the pump has a control box, follow the manufacturer’s wiring diagram and keep notes of wire positions. A common frustration is finding a “mystery” control box with no label; photographing the wiring before touching anything saves time later.
If the pump hums but does not run, the cause can include a failed capacitor, motor winding issue, or a tripped overload. If the pump runs but trips the breaker, the cause can include a short, ground fault, or motor overload from a restricted flow path. Electrical faults should be diagnosed with appropriate tools, because guessing can damage components.
Educational Case Examples
Case 1: Rapid Cycling After a Toilet Repair. A homeowner replaces a toilet flapper and notices the pump starts every 1–2 minutes when water is not being used. The pressure gauge shows the system reaching cut-in quickly and failing to hold cut-out for long. The homeowner checks for leaks and finds the toilet fill valve still running intermittently. After adjusting the fill valve and confirming no other fixtures leak, the pump cycling returns to a normal pattern with longer run intervals.
Case 2: Pump Runs, But Water Pressure Feels Weak. A renter reports that showers feel weak and the pump runs longer than before. The pressure gauge drops more than expected during use, and the pump does not reach the usual cut-out point. The service visit finds a waterlogged pressure tank with a failed bladder, so the tank stores little usable water. After replacing the tank and verifying pre-charge settings against the cut-in pressure, the pump cycles less often and pressure stabilizes during typical draw.
Checklist For Diagnosis
| Symptom | Likely Causes | What To Check First | When To Call A Pro |
|---|---|---|---|
| Frequent short cycling | Waterlogged tank, small leak, incorrect switch settings | Check tank air valve behavior, inspect for leaks, confirm cut-in/cut-out | If pre-charge and settings don’t match or cycling persists after leak repair |
| Pump runs but no water | Loss of prime (jet), clogged intake, failed check valve, electrical control fault | Verify valves open, check for pressure drop behavior, inspect check valve location | If you suspect well yield issues or electrical/control faults |
| Pump won’t start | Breaker trip, pressure switch failure, capacitor/motor issue | Check breaker, confirm pressure switch cut-in behavior, look for fault indicators | If breaker trips again or you find wiring/control enclosure damage |
| Weak pressure | Clogged filter, partially closed valve, worn pump, low well yield | Check filter service date, open valves fully, compare pressure readings under flow | If pressure drops drastically under normal demand or well yield seems reduced |
Step-by-step checklist you can follow:
- Record cut-in/cut-out settings from the pressure switch label and note your gauge reading range.
- Run water at one fixture and observe pump start time, run duration, and pressure behavior.
- Inspect for obvious leaks by checking toilets, faucets, and any visible wet spots.
- Check the pressure tank for waterlogged signs and verify pre-charge against the cut-in value using the tank manufacturer’s guidance.
- Inspect valves and filters for restrictions, then re-test the same water draw pattern.
- Only after mechanical checks, evaluate electrical faults, and stop if you see breaker trips or damaged wiring.
Common Mistakes To Avoid
One frequent mistake is adjusting pressure switch settings without confirming the tank pre-charge and without documenting the original cut-in/cut-out values. That can mask the real cause and lead to faster wear from short cycling. Another mistake is “fixing” cycling by draining the tank repeatedly, which does not restore the air cushion if the bladder has failed.
People also confuse pump noise with pump health. A pump can sound different when it runs dry, but noise alone does not confirm the cause. A better approach uses observation: does the pump run with normal pressure recovery, or does it stall, trip, or cycle rapidly? If you have a control box with a fault code, record it before resetting power; some systems require a specific reset sequence.
Skipping leak checks wastes time. A small leak can keep pressure from building, so the pump runs longer and the homeowner concludes the pump is weak. I’ve seen service calls where the pump was replaced while the actual issue was a dripping outdoor spigot left cracked after a freeze event.
Finally, avoid opening electrical enclosures while power remains on. Even experienced DIY work can go wrong when the system includes multiple breakers or a control box fed by more than one circuit. If you cannot confirm power isolation, stop and schedule a qualified well pump technician.
FAQ
What is the pressure tank for?
The pressure tank stores water under pressure using a compressed air cushion, which reduces pump cycling and smooths pressure during short water draws.
Why does my pump cycle so often?
Frequent cycling usually comes from a waterlogged tank, an air pre-charge mismatch, a small plumbing leak, or pressure switch settings that do not match the tank and system behavior.
How do I know if the check valve failed?
A failed check valve often shows up as rapid pressure loss after the pump shuts off, causing the pump to restart sooner than expected.
Can a weak well cause pump problems?
Low well yield can reduce water delivery and can lead to pump overheating or protective shutdowns, especially during high demand or after the well level drops.
What should I measure during troubleshooting?
Measure pump start/stop timing, pressure gauge readings during water flow, tank behavior (including air valve signs), and look for leaks before changing electrical settings.
Author's Insight
Well pump systems behave like a pressure-controlled loop: the pump moves water, the tank stores part of that flow, and the pressure switch decides when to start and stop. Most “mystery” failures trace back to a small set of interactions: tank air charge, check valve behavior, flow restrictions, and electrical control response. A careful diagnostic approach starts with repeatable observations during a known water draw, then checks the components that most directly affect pressure stability. If you keep notes of cut-in/cut-out settings and fault indicators, you reduce guesswork and avoid unnecessary parts replacement.
I also recommend treating pre-charge checks as a measurement task, not a guess. Using the tank manufacturer’s guidance and matching pre-charge to the cut-in setting prevents the common cycle-and-replace pattern that frustrates homeowners.
Key Takeaways
A well pump system moves water through a controlled cycle: pump on at cut-in, pump off at cut-out, with the pressure tank smoothing demand.
Rapid cycling often points to tank air issues or leaks, while “runs but no water” points to prime, check valve, or flow path restrictions.
Use a repeatable test during water use, record pressure behavior, and verify tank pre-charge before changing pressure switch settings.
Stop when electrical faults appear, especially breaker trips or damaged wiring, and switch to a qualified service call.